How to Repair Windows 11 with DISM and SFC

When your Windows 11 system files become corrupted or go missing, the Deployment Image Servicing and Management (DISM) tool can often save the day. Combined with the System File Checker (SFC) tool, DISM helps repair Windows images to restore your system's health. Here's a step-by-step guide on how to use these powerful tools effectively.
What is DISM?
DISM is a command-line tool in Windows 11 used to prepare, modify, and repair system images. It helps fix boot issues, performance problems, and other system errors by addressing issues within Windows Recovery Environment, Windows Setup, and Windows PE (WinPE).
Key DISM Features
- CheckHealth: Quickly checks if a Windows image has any corruption.
- ScanHealth: Performs a more thorough scan for potential issues.
- RestoreHealth: Repairs the image using files from Windows Update or a specified source.
Using DISM to Repair Windows 11
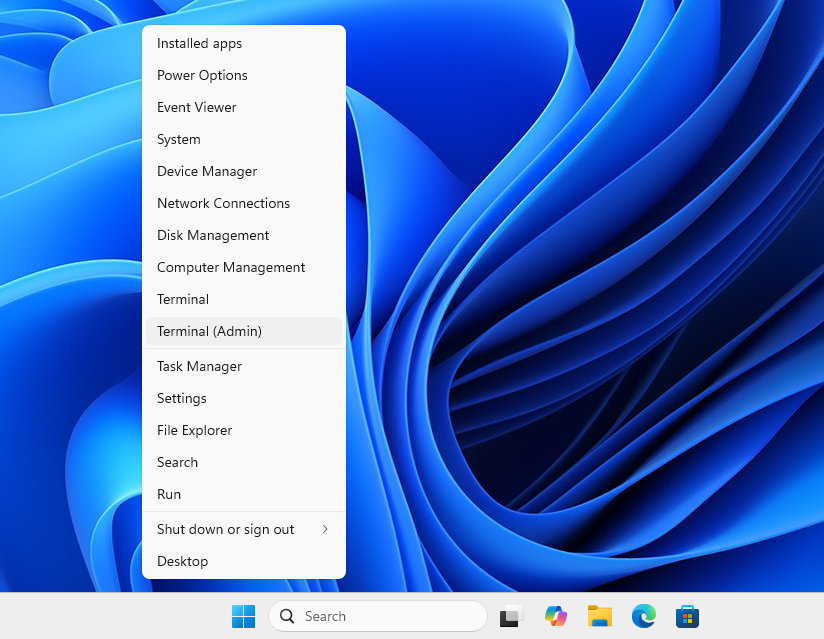
Before starting you need to open a terminal with Administrator privileges, you can do so right clicking on the Start icon and select Terminal (Admin)
Check for Corruption with CheckHealth (optional)
The CheckHealth command lets you determine whether corruption exists:
DISM /Online /Cleanup-Image /CheckHealth
Scan for Extensive Issues with ScanHealth (optional)
Conduct a detailed scan using the ScanHealth command:
DISM /Online /Cleanup-Image /ScanHealth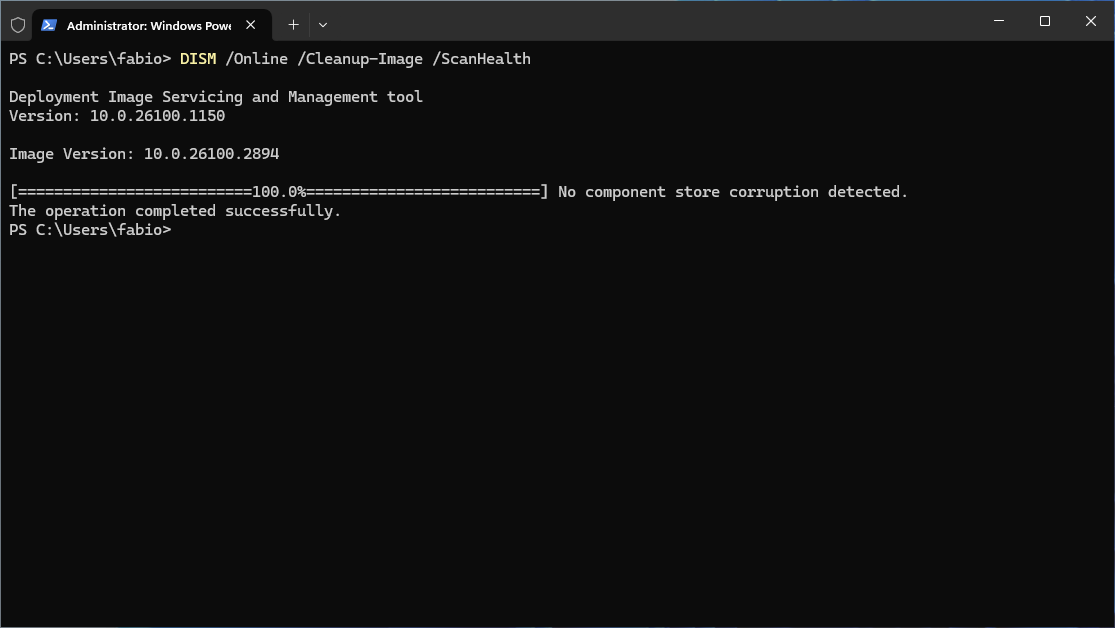
Repair the Image with RestoreHealth
To repair an image, execute the RestoreHealth command:
DISM /Online /Cleanup-Image /RestoreHealth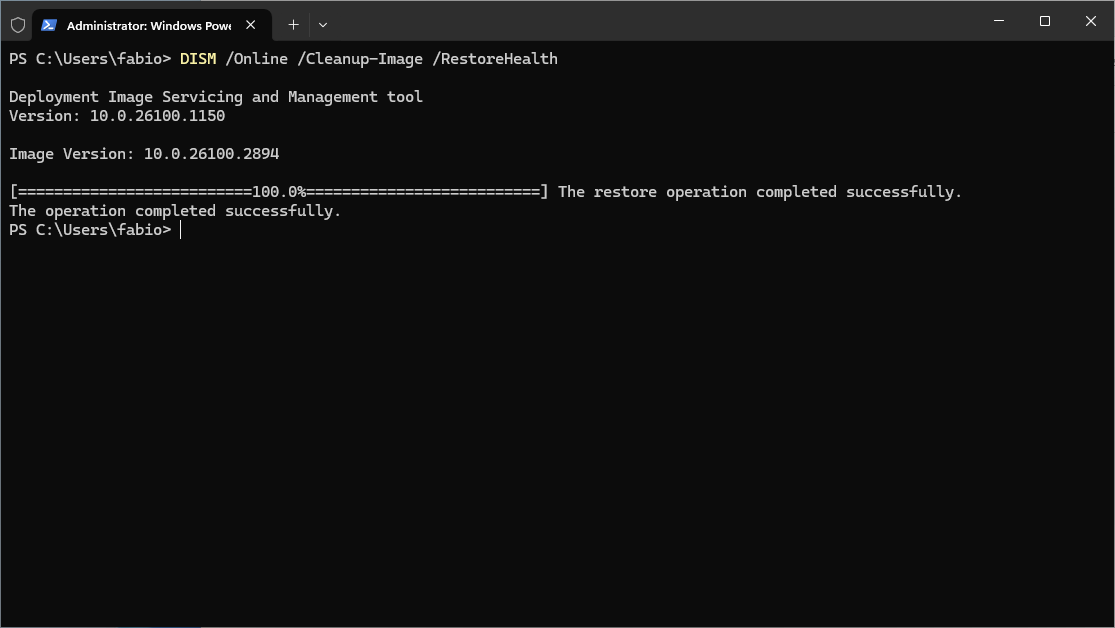
This step connects to Windows Update to replace damaged files. If internet access is unavailable or you encounter issues, use a local source file.
Using an Install Image as a Repair Source
When DISM tools can’t access the required components online, you can use a local image (install.wim or install.esd):
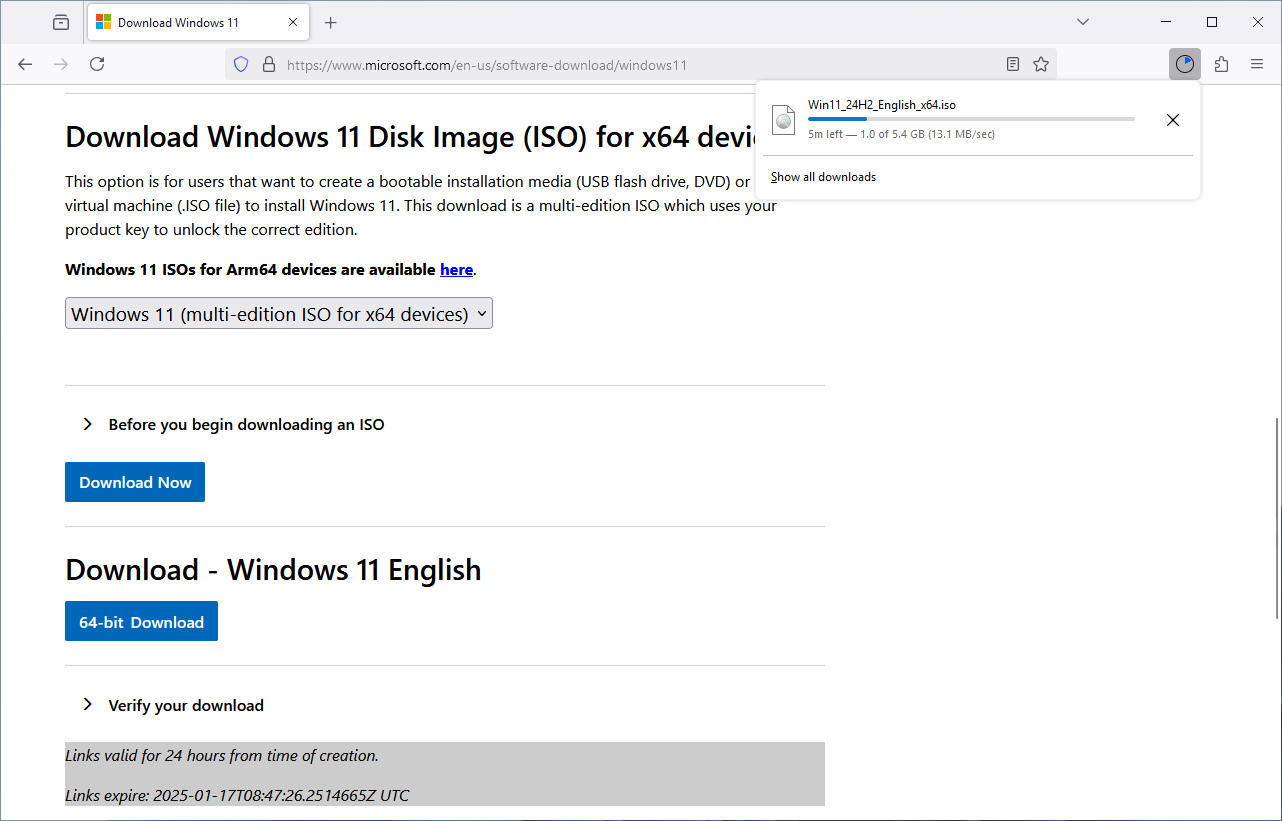
1. Download Windows 11 ISO
Download the ISO directly from Microsoft’s website here.

Head over to the Download Windows 11 Disk Image section
Mount the ISO file by double-clicking it
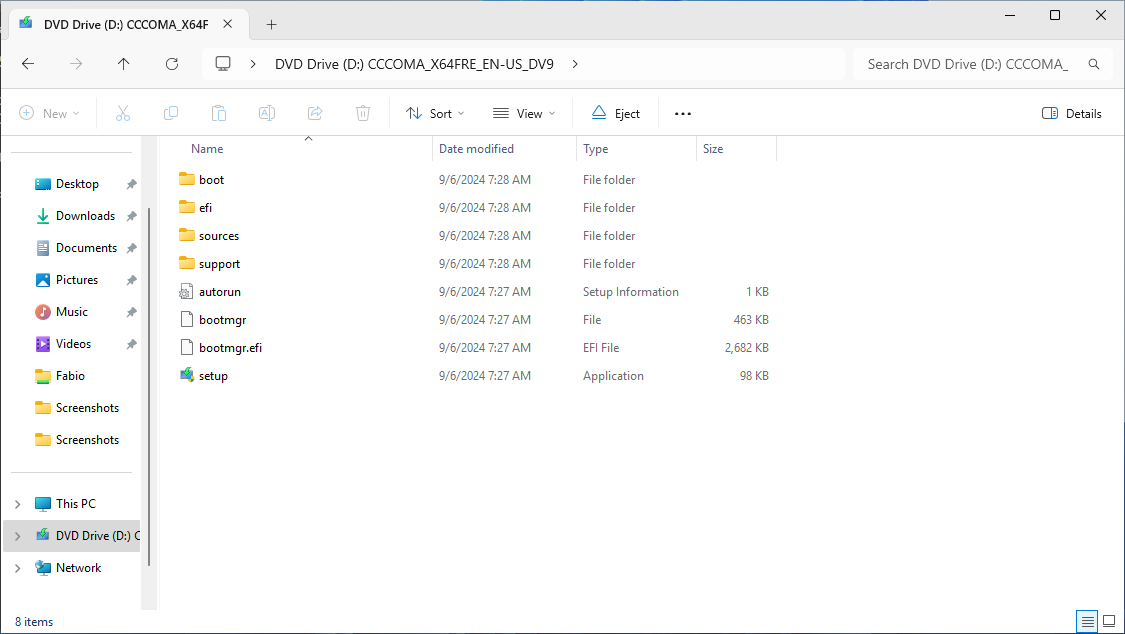
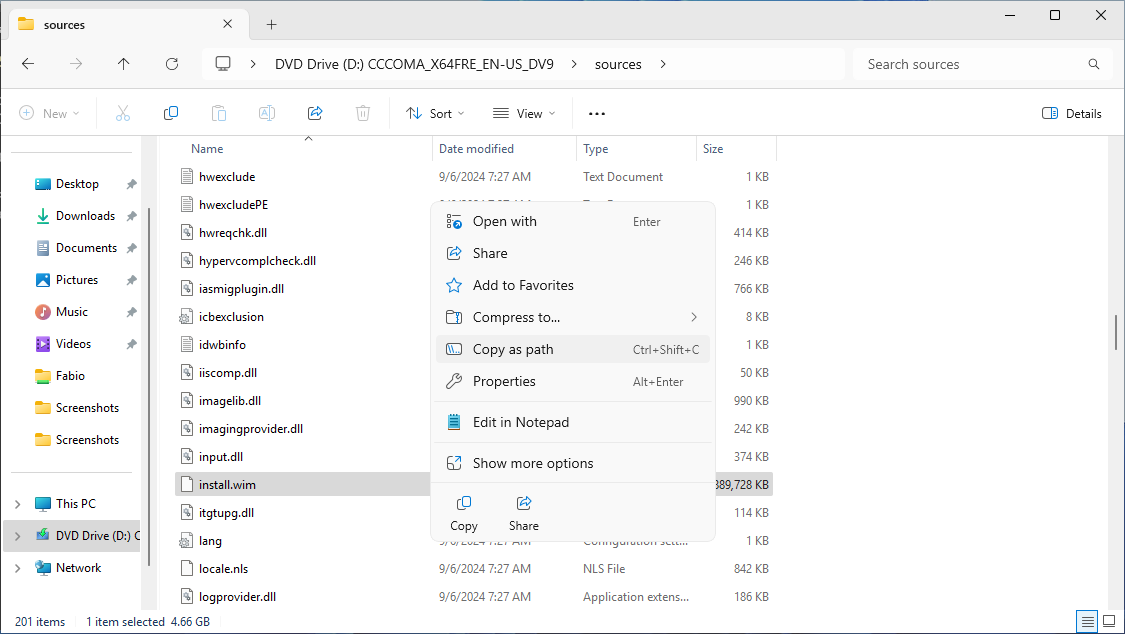
Open the sources folder and copy the path of the file install.wim
2. Use DISM with an Install Image
Replace <your file path> with the path you just copied
DISM /Online /Cleanup-Image /RestoreHealth /Source:esd:<your file path>:1 /LimitAccess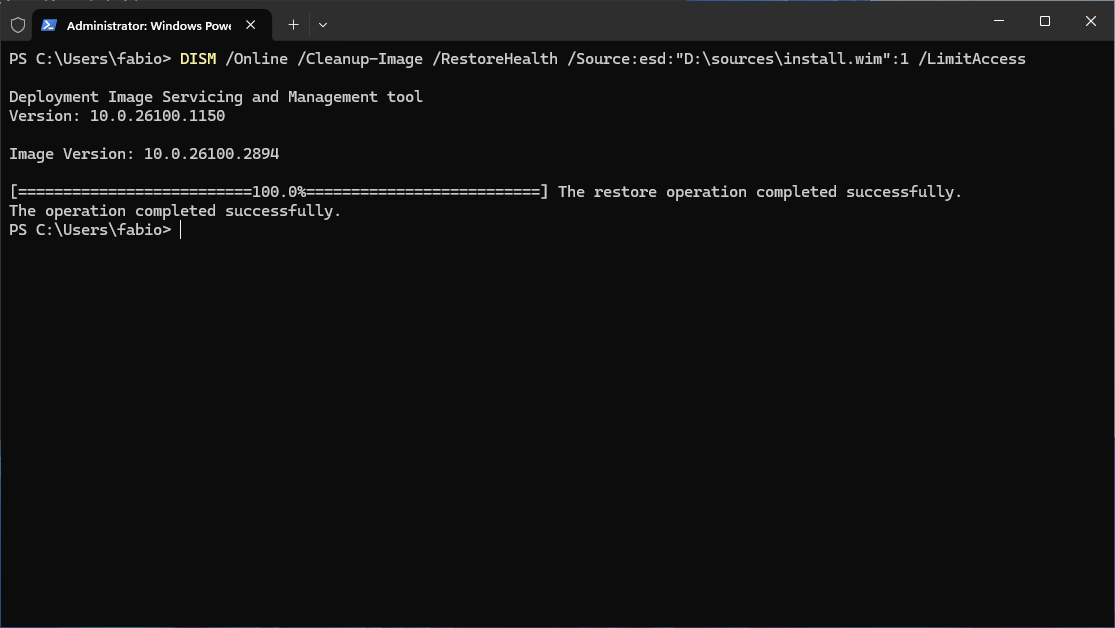
3. Repair with SFC
Once the image is healthy, use SFC to ensure installation integrity and replace corrupted files:
sfc /scannow
Repeat this process up to three times if necessary.
Don't forget to Reboot your PC
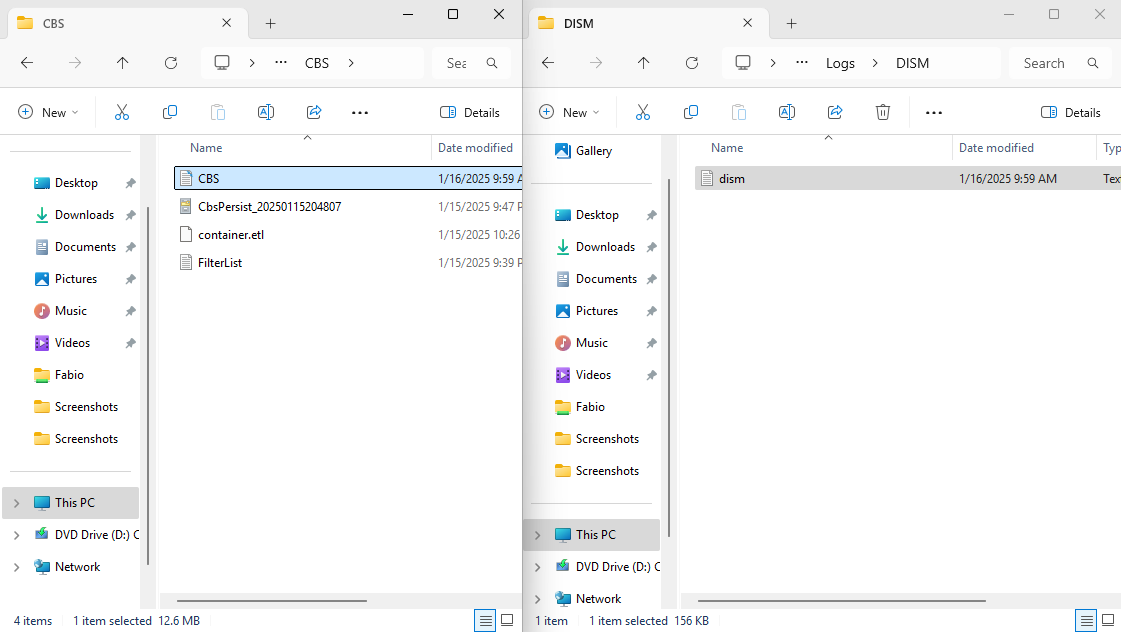
If you still have problems ask for help in the Windows Comunity and don't forget to provide logs.
Log files are saved at %windir%\Logs\CBS\CBS.log and %windir%\Logs\DISM\dism.log
By following these steps, you can effectively use DISM and SFC to repair and restore your Windows 10 system. These non-destructive commands keep your files intact while resolving critical issues. Always ensure important data is backed up before proceeding.